
Connecting the Camera
1. Allow Through Windows Firewall (First Time Only)
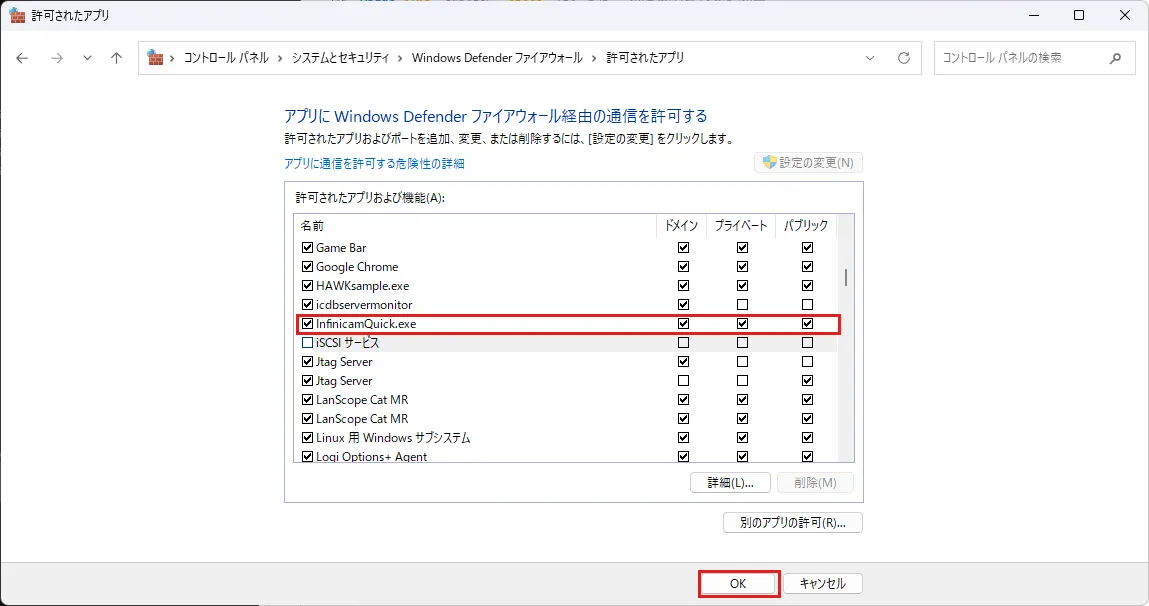
Section titled “1. Allow Through Windows Firewall (First Time Only)”Allow communication through Windows Firewall so that InfinicamQuick can communicate with the camera.
-
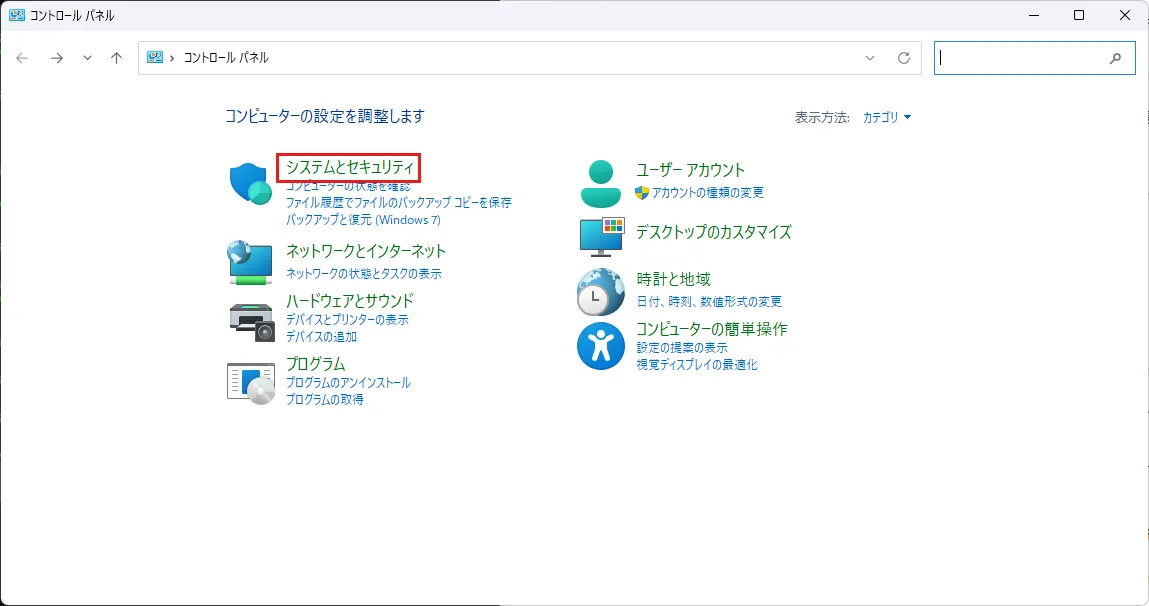
Type “Control Panel” into the Start menu search box, open it, and click System and Security.
-
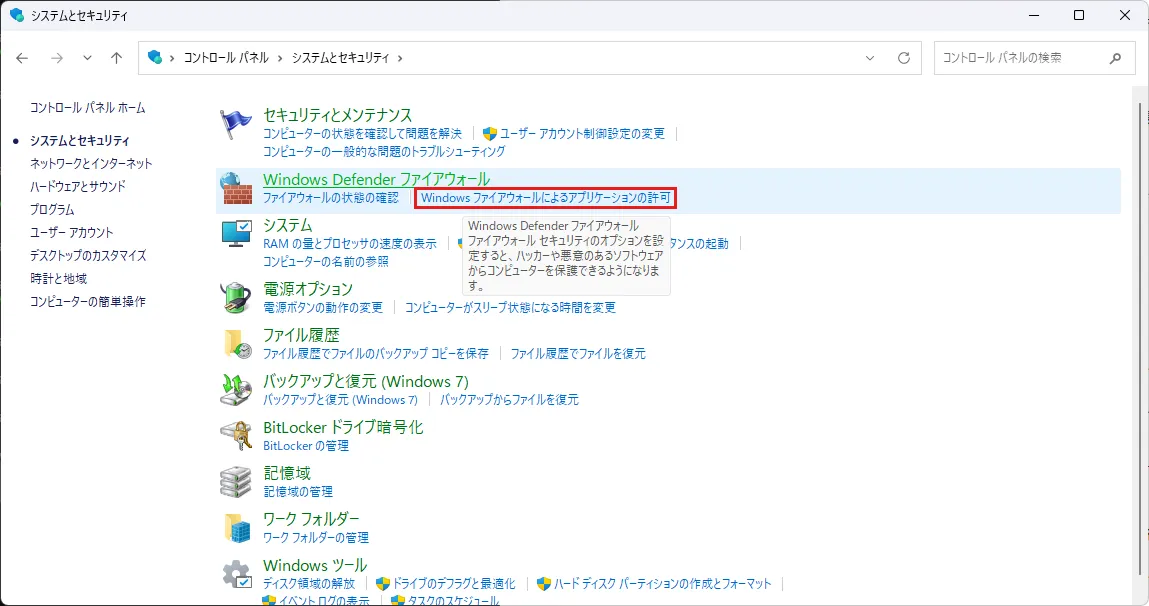
Click Allow an app through Windows Firewall.
-
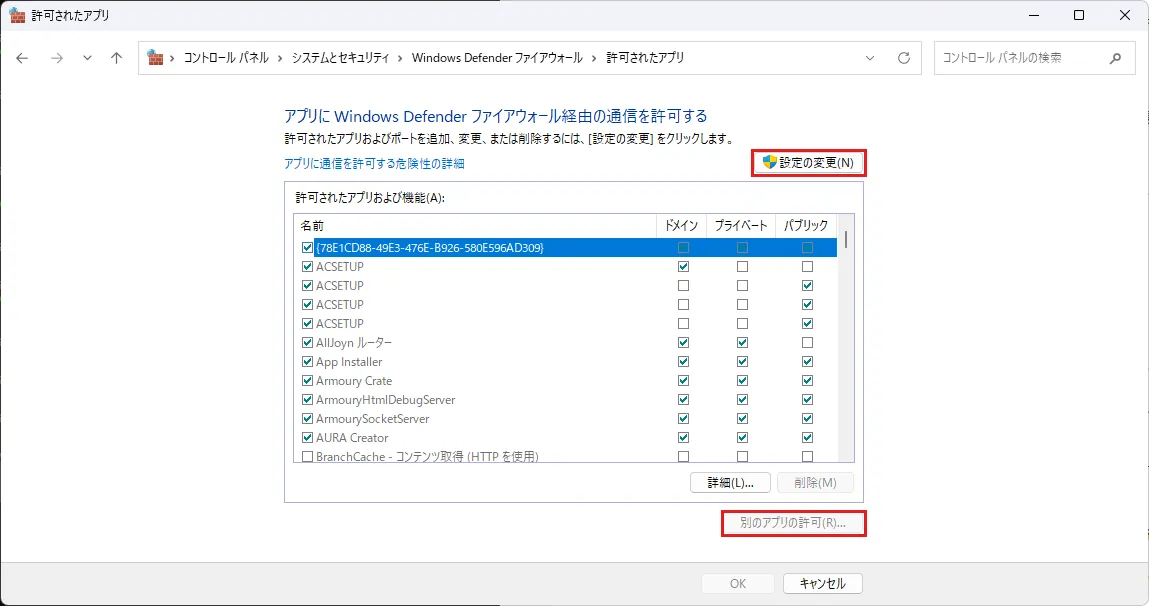
Click Change settings in the upper right. Then click Allow another app, which becomes clickable.
-
Click Browse, select InfinicamQuick.exe inside the
InfinicamQuickfolder, and click Open. Once InfinicamQuick.exe appears in the list of apps, click Add.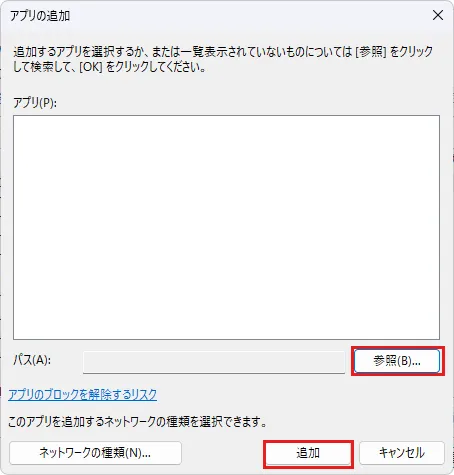
-
Confirm that both Private and Public are checked for the added InfinicamQuick.exe in the list, then click OK.
2. Network Configuration
Section titled “2. Network Configuration”To communicate with the camera, configure the network adapter (NIC) on the PC connected to the camera with an IP address on the same network as the camera.
| IP address | Subnet mask | |
|---|---|---|
| Camera (factory default) | 192.168.0.10 |
255.255.255.0 |
| Example PC setting | 192.168.0.1 |
255.255.255.0 |
-
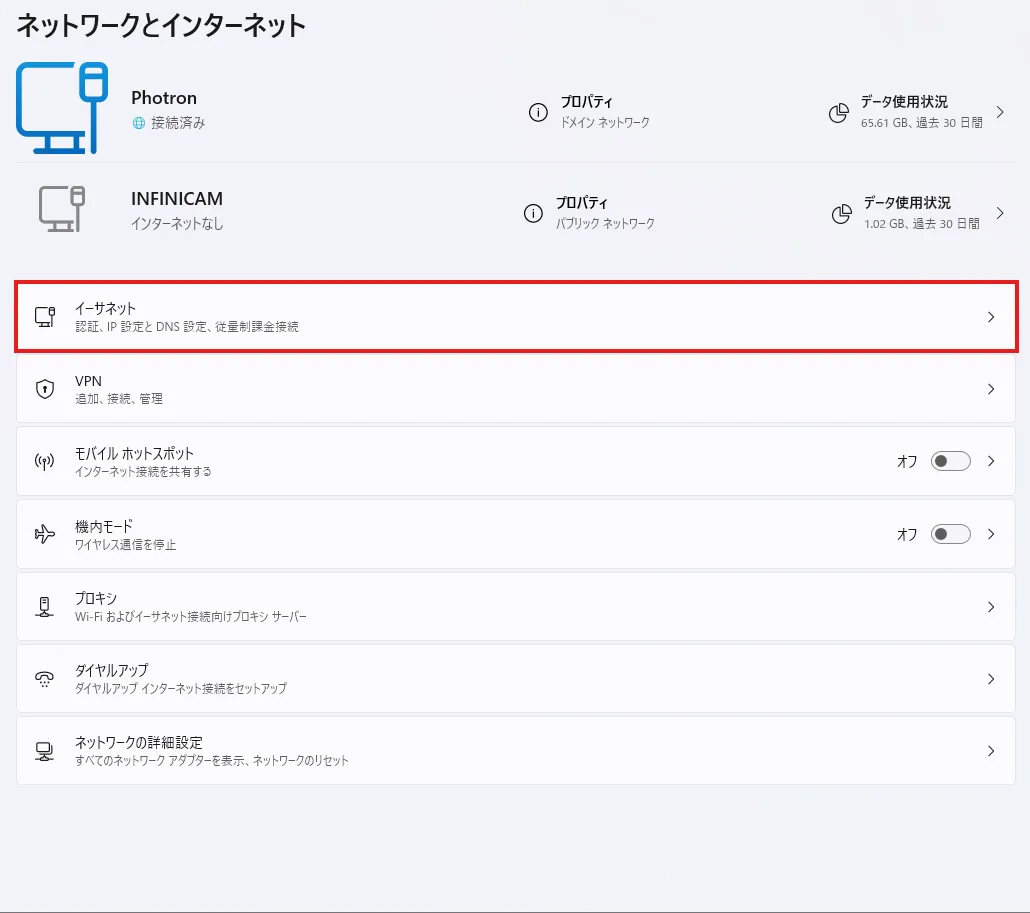
From the Start menu, open Settings → Network & internet and click Ethernet.
-
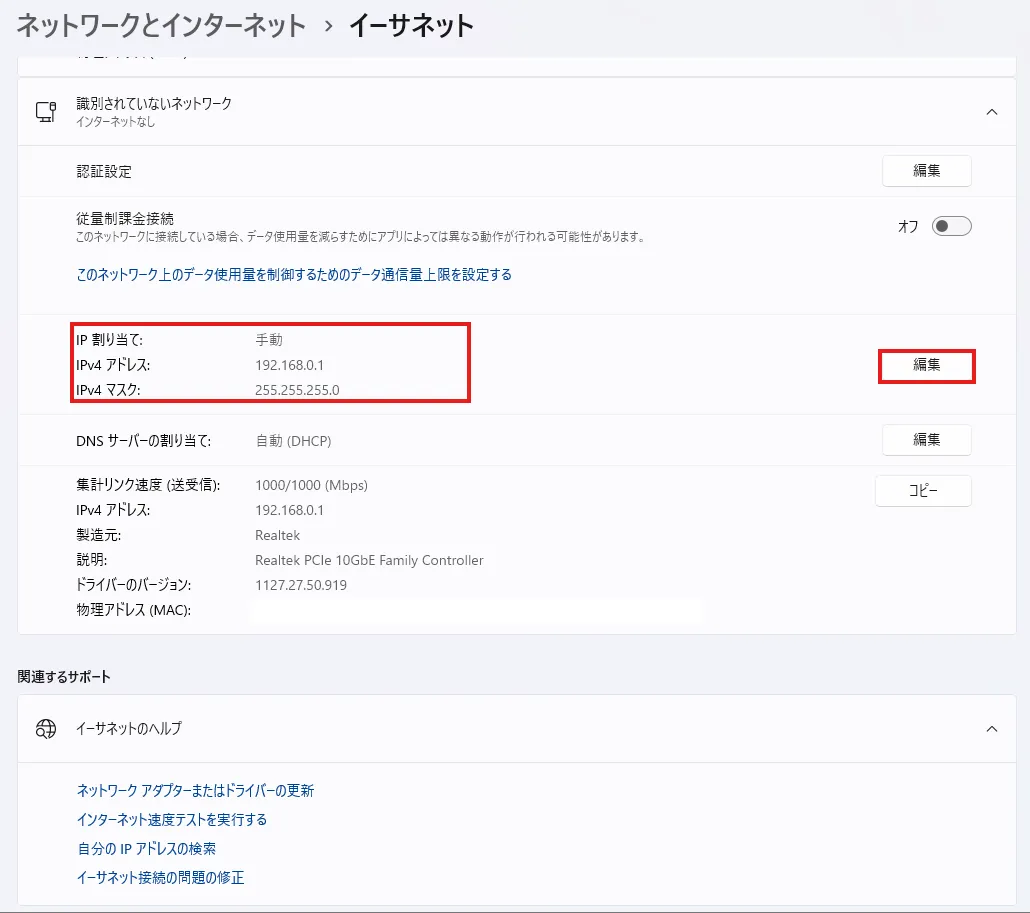
Open the adapter connected to the camera (often shown as “Unidentified network”) and click Edit next to IP assignment.
-
Select Manual, turn on IPv4, enter the following, and click Save.
- IP address:
192.168.0.1 - Subnet mask:
255.255.255.0 - Gateway / DNS: leave blank
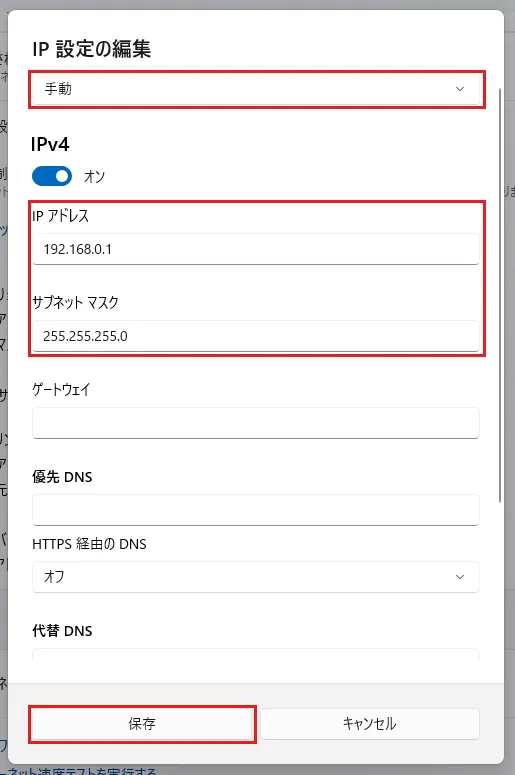
- IP address:
3. Connect to the Camera
Section titled “3. Connect to the Camera”-
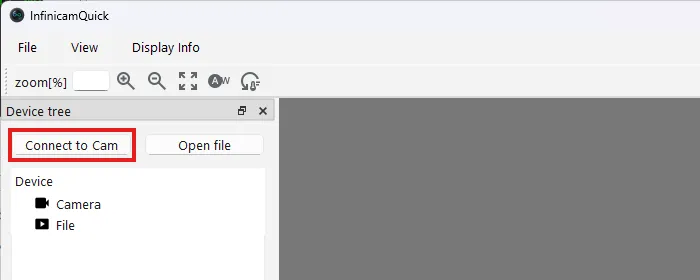
Click Connect to Cam in the upper left of the main screen.
-
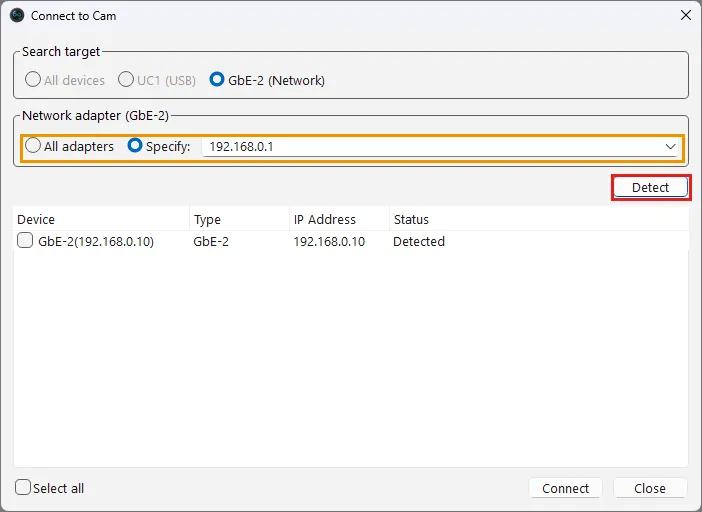
In the Connect to Cam screen, click Detect to start searching for the camera.
-
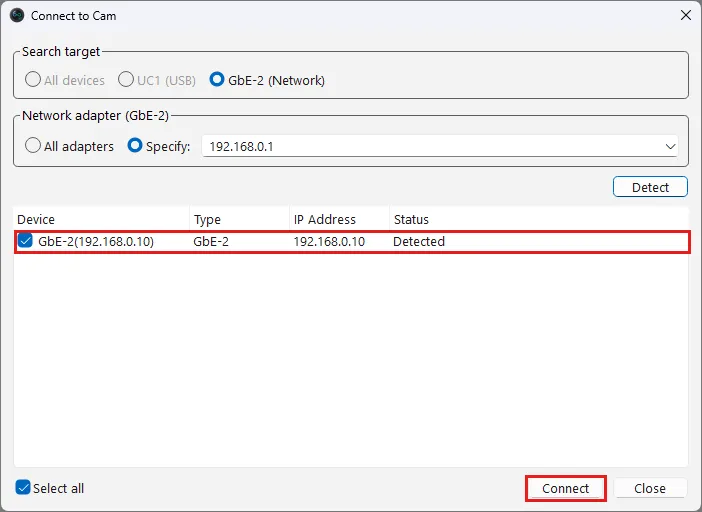
Any cameras found are displayed in the list. Check the checkbox next to the camera you want to connect to, then click Connect.
-
Once the connection completes, the camera (for example,
GbE-2(192.168.0.10)) is added under Camera in the Device tree, and the live video feed is displayed.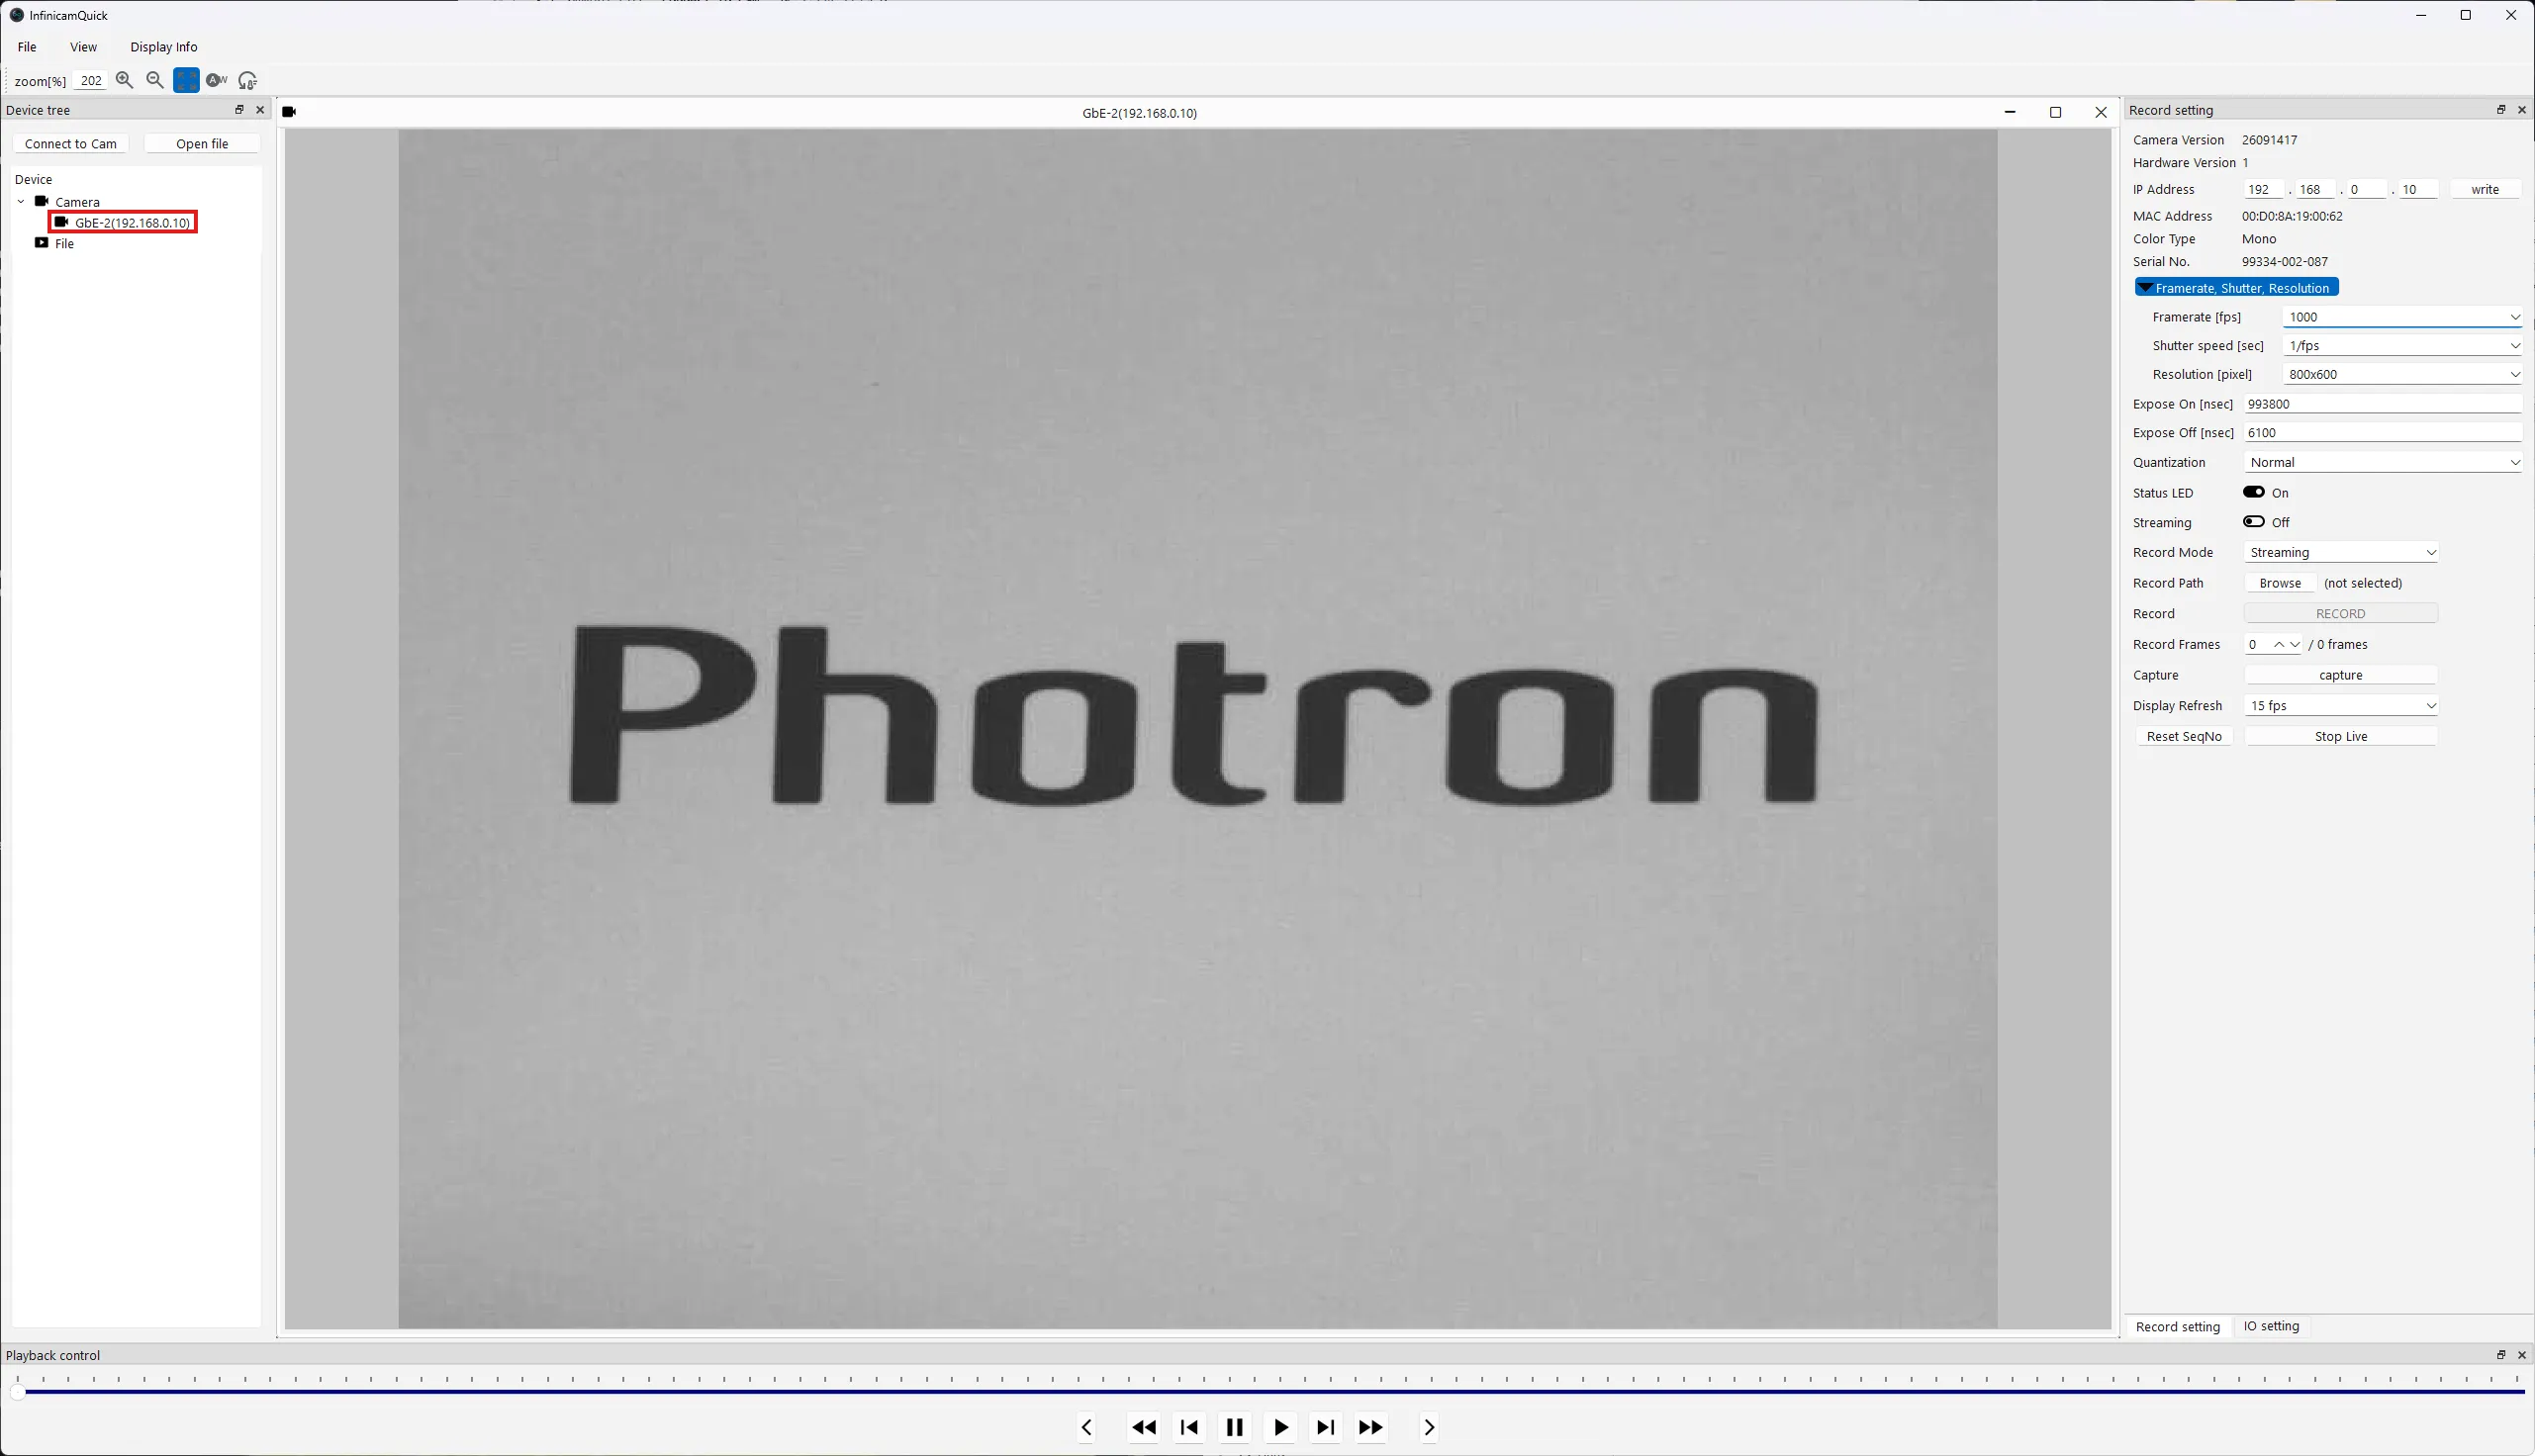
Next, proceed to Live View & Capture.